nopCommerce Azure Active Directory Login plugin
by admin | Oct 17, 2019 | nopCommerce |
Plugin Installation Guide
- Please download the plugin using the link provided after you have purchase the plugin from our store.
- ***If you have installed the previous version of the plugin, please uninstall it and remove from the plugin folder in your nopCommerce site.
- Unzip the file and place the plugin folder (Zealops.AzureAdLogin) inside your nopCommerce website under IIS (in the Plugins folder).
- Navigate to your nopCommerce site, then the admin page, login with admin login.
- From the admin page, navigate to Configuration > Plugins > Local plugins
- Locate the Azure AD authentication plugin and install it (it might reset the website).
- Then navigate to Configuration > External authentication
- On the Azure AD authentication plugin: click edit and set it to active and Update.
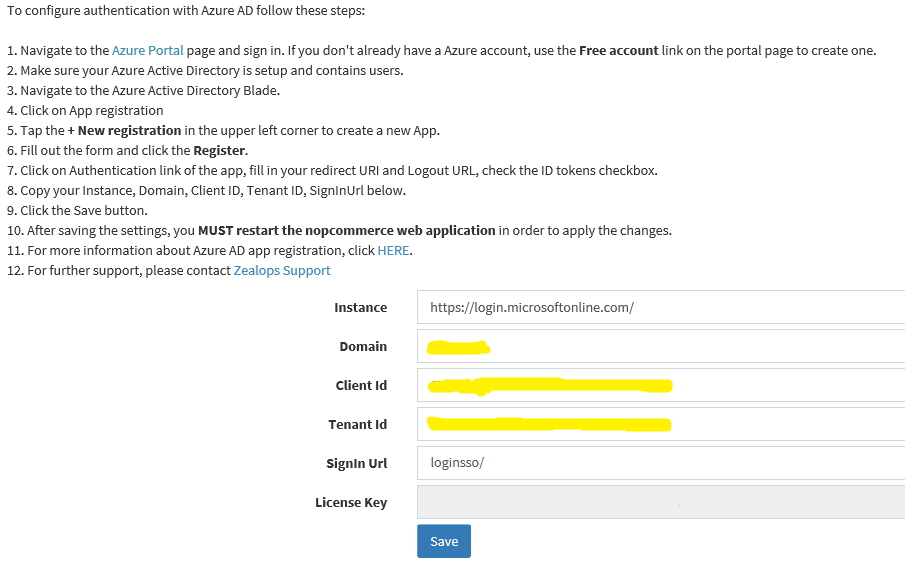
- On the same screen, click on Configure and update the parameters from the instructions on that page (should look similar to the image below except for Domain, Client ID, and Tenant Id – see section “To Register new Application with Azure AD” below on how to get Client ID and Tenant ID), click Save
- Do a reset on your nopCommerce website (iisreset).
- Logout and navigate to your nopCommerce home page and Click Log In.
- Scroll pass the Log In page and you’ll see the “Log in with Azure AD” button. Click on it and login using your Azure AD credentials.
- You should be redirected back to the nopCommerce homepage with the Azure AD credentials.
Register new Application with Azure AD:
- Navigate to the Azure Portal page and sign in. If you don’t already have a Azure account, use the Free account link on the portal page to create one.
- Make sure your Azure Active Directory is setup and contains users.
- Navigate to the Azure Active Directory Blade.
- Click on App registration
- Tap the + New registration in the upper left corner to create a new App.
- Fill out the form and click the Register.
- Click on Authentication link of the app, fill in your redirect URI and Logout URL, check the ID tokens checkbox.
- Copy your Instance, Domain, Client ID, Tenant ID, SignInUrl below.
- Click the Save button.
- After saving the settings, you MUST restart the nopcommerce web application in order to apply the changes.
- For more information about Azure AD app registration, click HERE.
- For further support, please contact Zealops Support